TensorBoard in Colab
Tensorboard套件能視覺化呈現使用Tensorflow或Keras訓練過程中相關數據(Accuracy、Loss、Gradient…)。
Colab是Google提供一個虛擬環境來執行程式碼的地方。
colab無法在command環境下開啟tensorboard和不能指定訓練時記錄檔(logdir)。
Ngrok使tensorboard可在Colab上使用。
轉換概念是把原本在localhost上的service轉成一個網址,當外部有人連上這個網址時,Ngrok就會把外部的請求轉送localhost上的特定port。
Step1. 在Colab下載Ngrok,前面加上 ! 就可以使用linux下的command
!wget https://bin.equinox.io/c/4VmDzA7iaHb/ngrok-stable-linux-amd64.zip
!unzip ngrok-stable-linux-amd64.zip
Step2.指定訓練過程的紀錄檔(logdir)要存放在virtual machine下的哪個位置,並開啟tensorboard service(port 6006)
LOG_DIR = './log'
get_ipython().system_raw(
'tensorboard --logdir {} --host 0.0.0.0 --port 6006 &'
.format(LOG_DIR)
)
Step3.開啟ngrok服務,並綁定port 6006
get_ipython().system_raw('./ngrok http 6006 &')
Step4. 產生一組網址
! curl -s http://localhost:4040/api/tunnels | python3 -c \
"import sys, json; print(json.load(sys.stdin)['tunnels'][0]['public_url'])"
從外部連到這組網址,就會導向virtual machine的port 6006,也就是colab裝置內的tensorboard。
在原本tensorflow程式檔裡,神經網絡運算初始sess.run(init)之後,加入欲使用的tensorboard指令:
writer = tf.summary.FileWriter("./log", graph = sess.graph)
" "內的路徑要改為Step 2設定的LOG_DIR。
tf.summary.FileWriter()將視覺化檔案輸出。
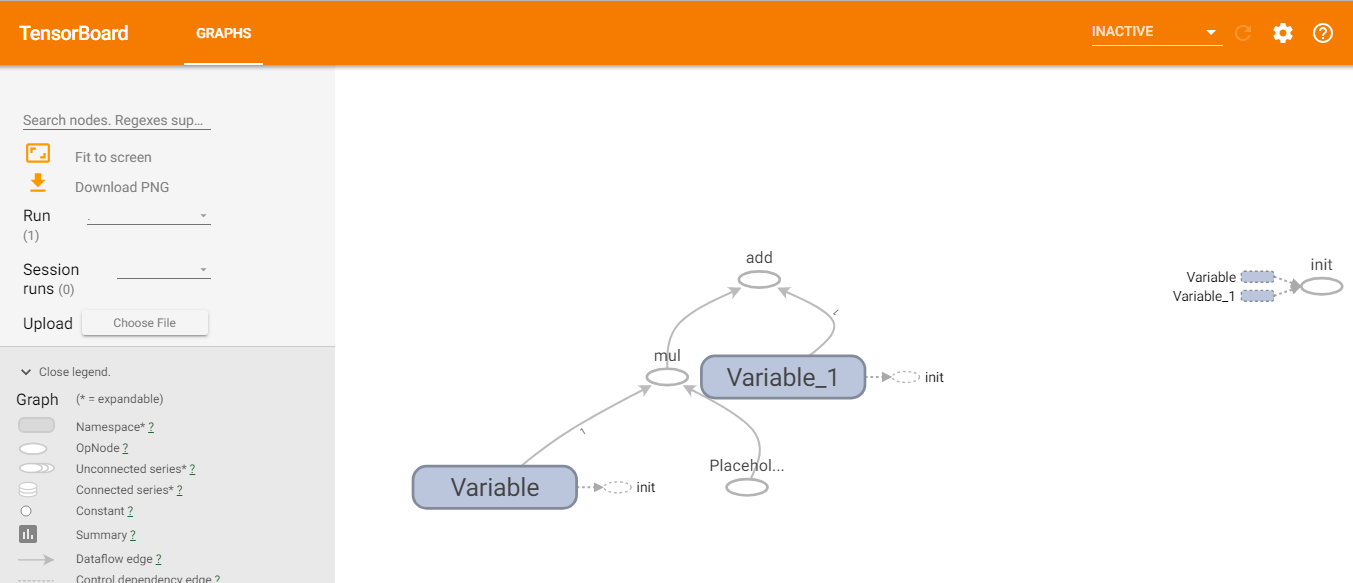
Fig 1. TensorBoard介面
Fig 1.是進入http://8979d72c.ngrok.io 後,可以在Graphs頁籤下看到神經網絡圖。
[0]https://john850512.wordpress.com/2018/07/13/7-13colab介紹-如何在colab上使用tensorboard/