preprocess 操作細節
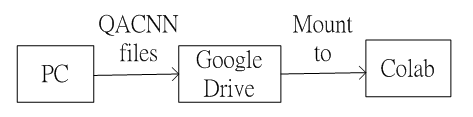
Fig.1 QACNN 資料夾將會先上傳至 google drive,再掛載到 Colab 之下執行
Fig.1 說明 QACNN 資料夾將會先上傳至 google drive,再掛載到 Colab
在 Colab 上執行 QACNN 的流程

Fig.2 在 Colab 上執行 QACNN 的流程
1. Upload QACNN files to Google Drive
將 QACNN 資料夾拖曳到 google drive 上傳
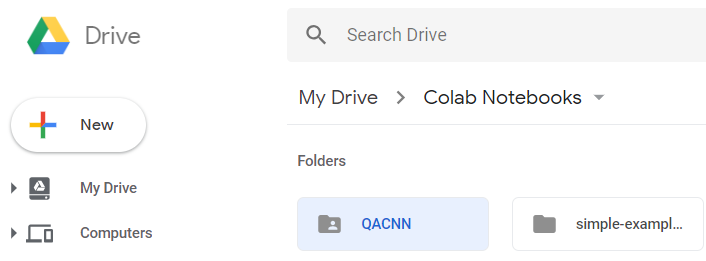
Fig.3 將 QACNN 資料夾拖曳到 google drive
2. Mount Google Drive to Colab
2-1 安裝google-drive-ocamlfuse
# Install a Drive FUSE wrapper.
# https://github.com/astrada/google-drive-ocamlfuse
!apt-get update -qq 2>&1 > /dev/null
!apt-get install -y -qq software-properties-common python-software-properties module-init-tools
!add-apt-repository -y ppa:alessandro-strada/ppa 2>&1 > /dev/null
!apt-get update -qq 2>&1 > /dev/null
!apt-get -y install -qq google-drive-ocamlfuse fuse

# Generate auth tokens for Colab
from google.colab import auth
auth.authenticate_user()

# Generate creds for the Drive FUSE library.
from oauth2client.client import GoogleCredentials
creds = GoogleCredentials.get_application_default()
import getpass
# Work around misordering of STREAM and STDIN in Jupyter.
# https://github.com/jupyter/notebook/issues/3159
prompt = !google-drive-ocamlfuse -headless -id={creds.client_id} -secret={creds.client_secret} < /dev/null 2>&1 | grep URL
vcode = getpass.getpass(prompt[0] + '\n\nEnter verification code: ')
!echo {vcode} | google-drive-ocamlfuse -headless -id={creds.client_id} -secret={creds.client_secret}
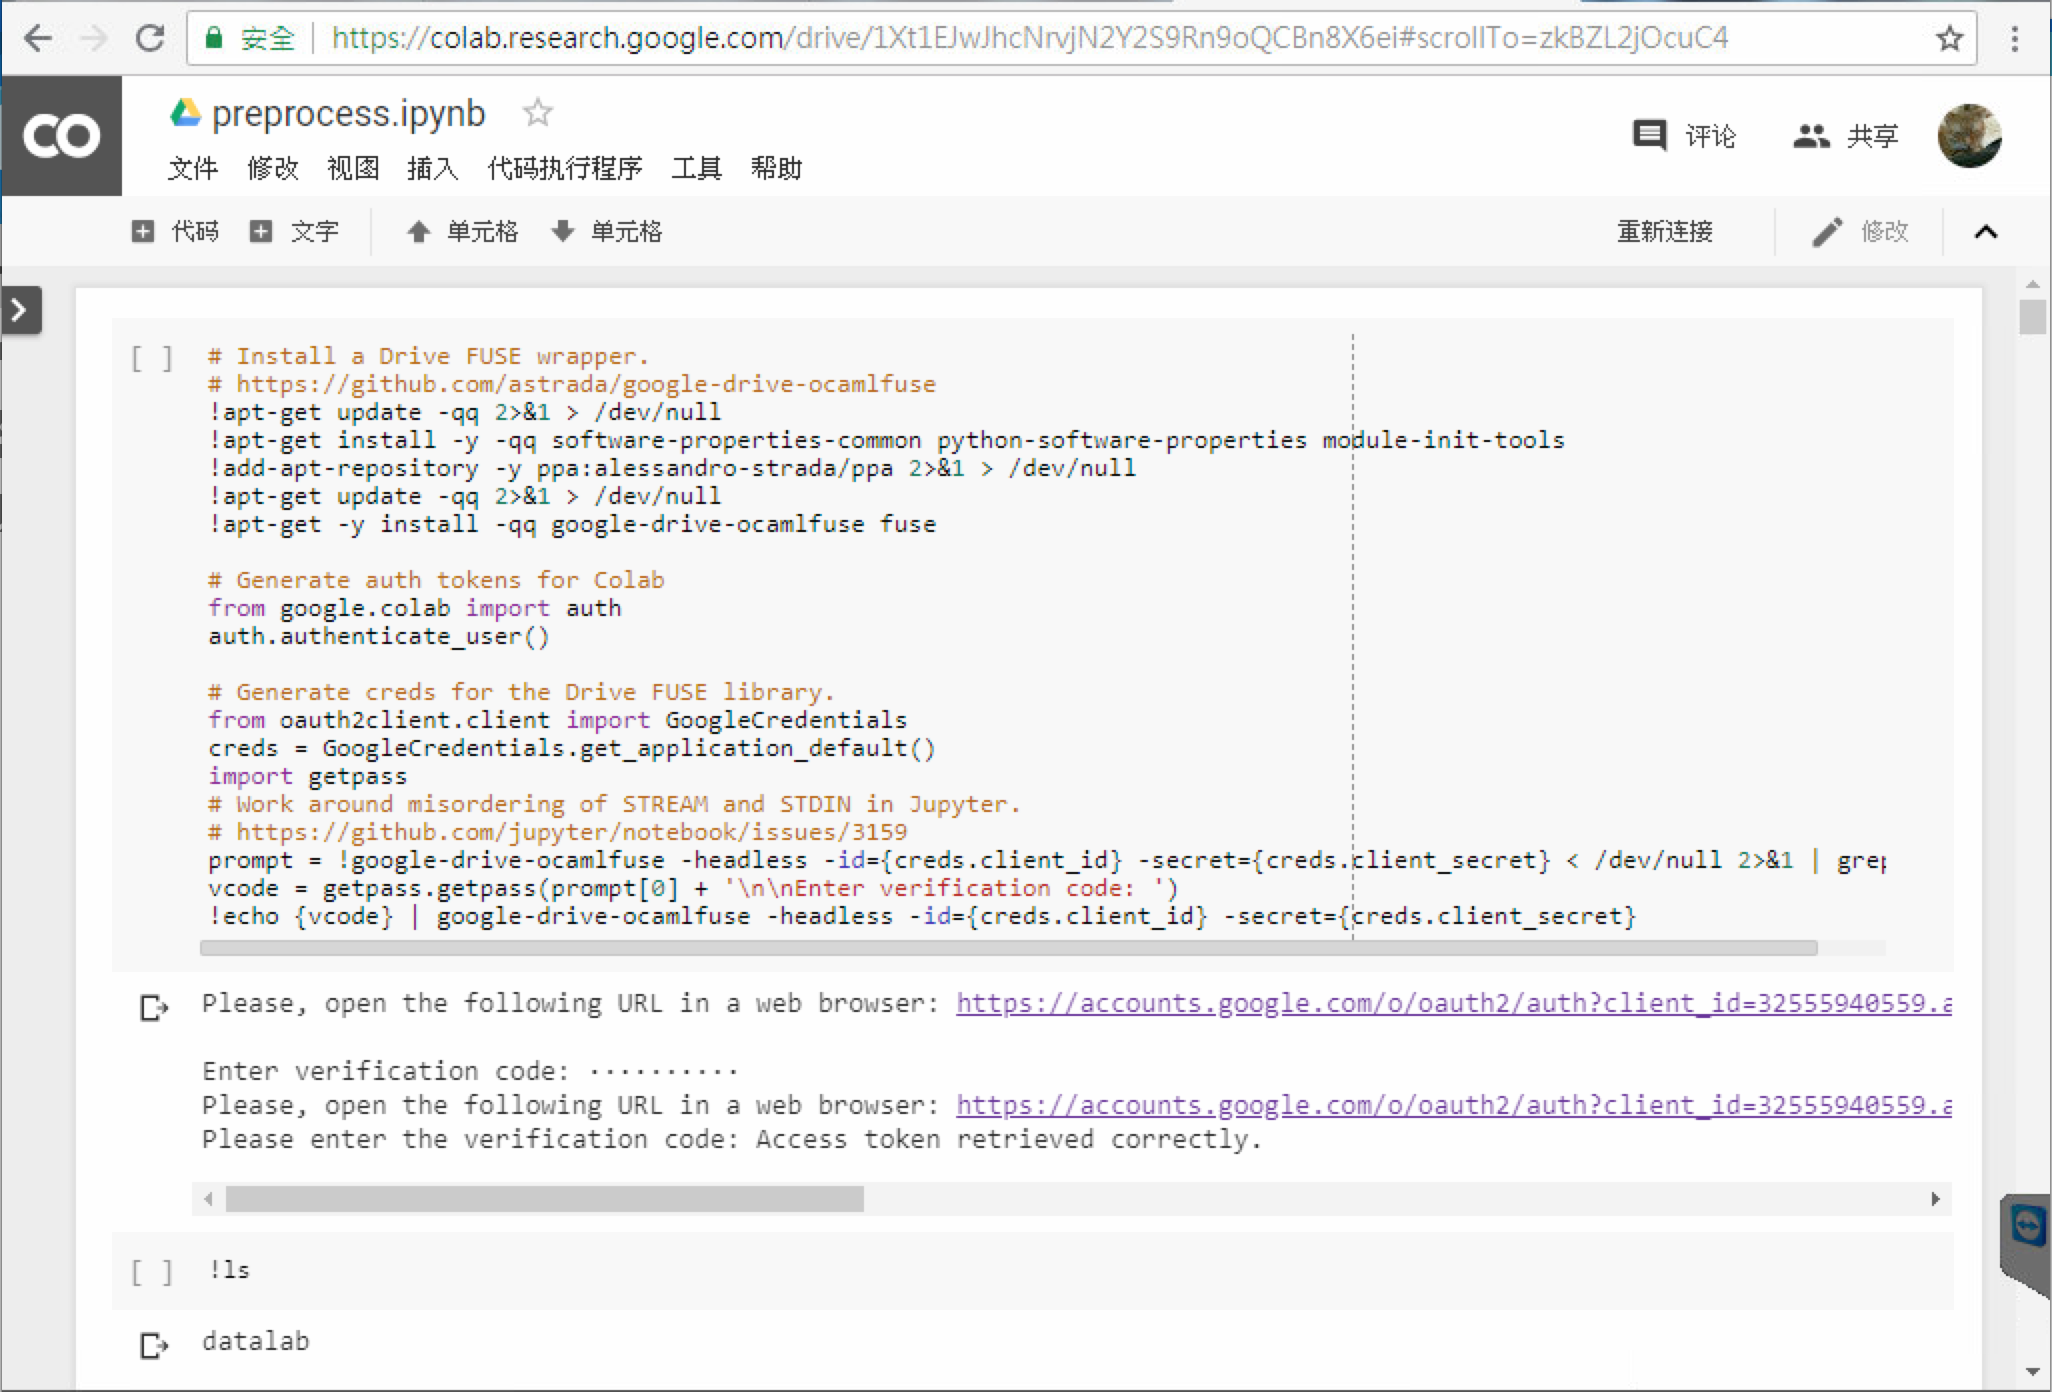
Figure 4 安裝 google-drive-ocamlfuse
Figure 4 呈現安裝google-drive-ocamlfuse執行的結果。
2-2 mount google drive and relocate path to QACNN-master
!ls

!mkdir -p drive
!google-drive-ocamlfuse drive

!ls

%cd drive/QACNN-master

%cd preprocess

!ls
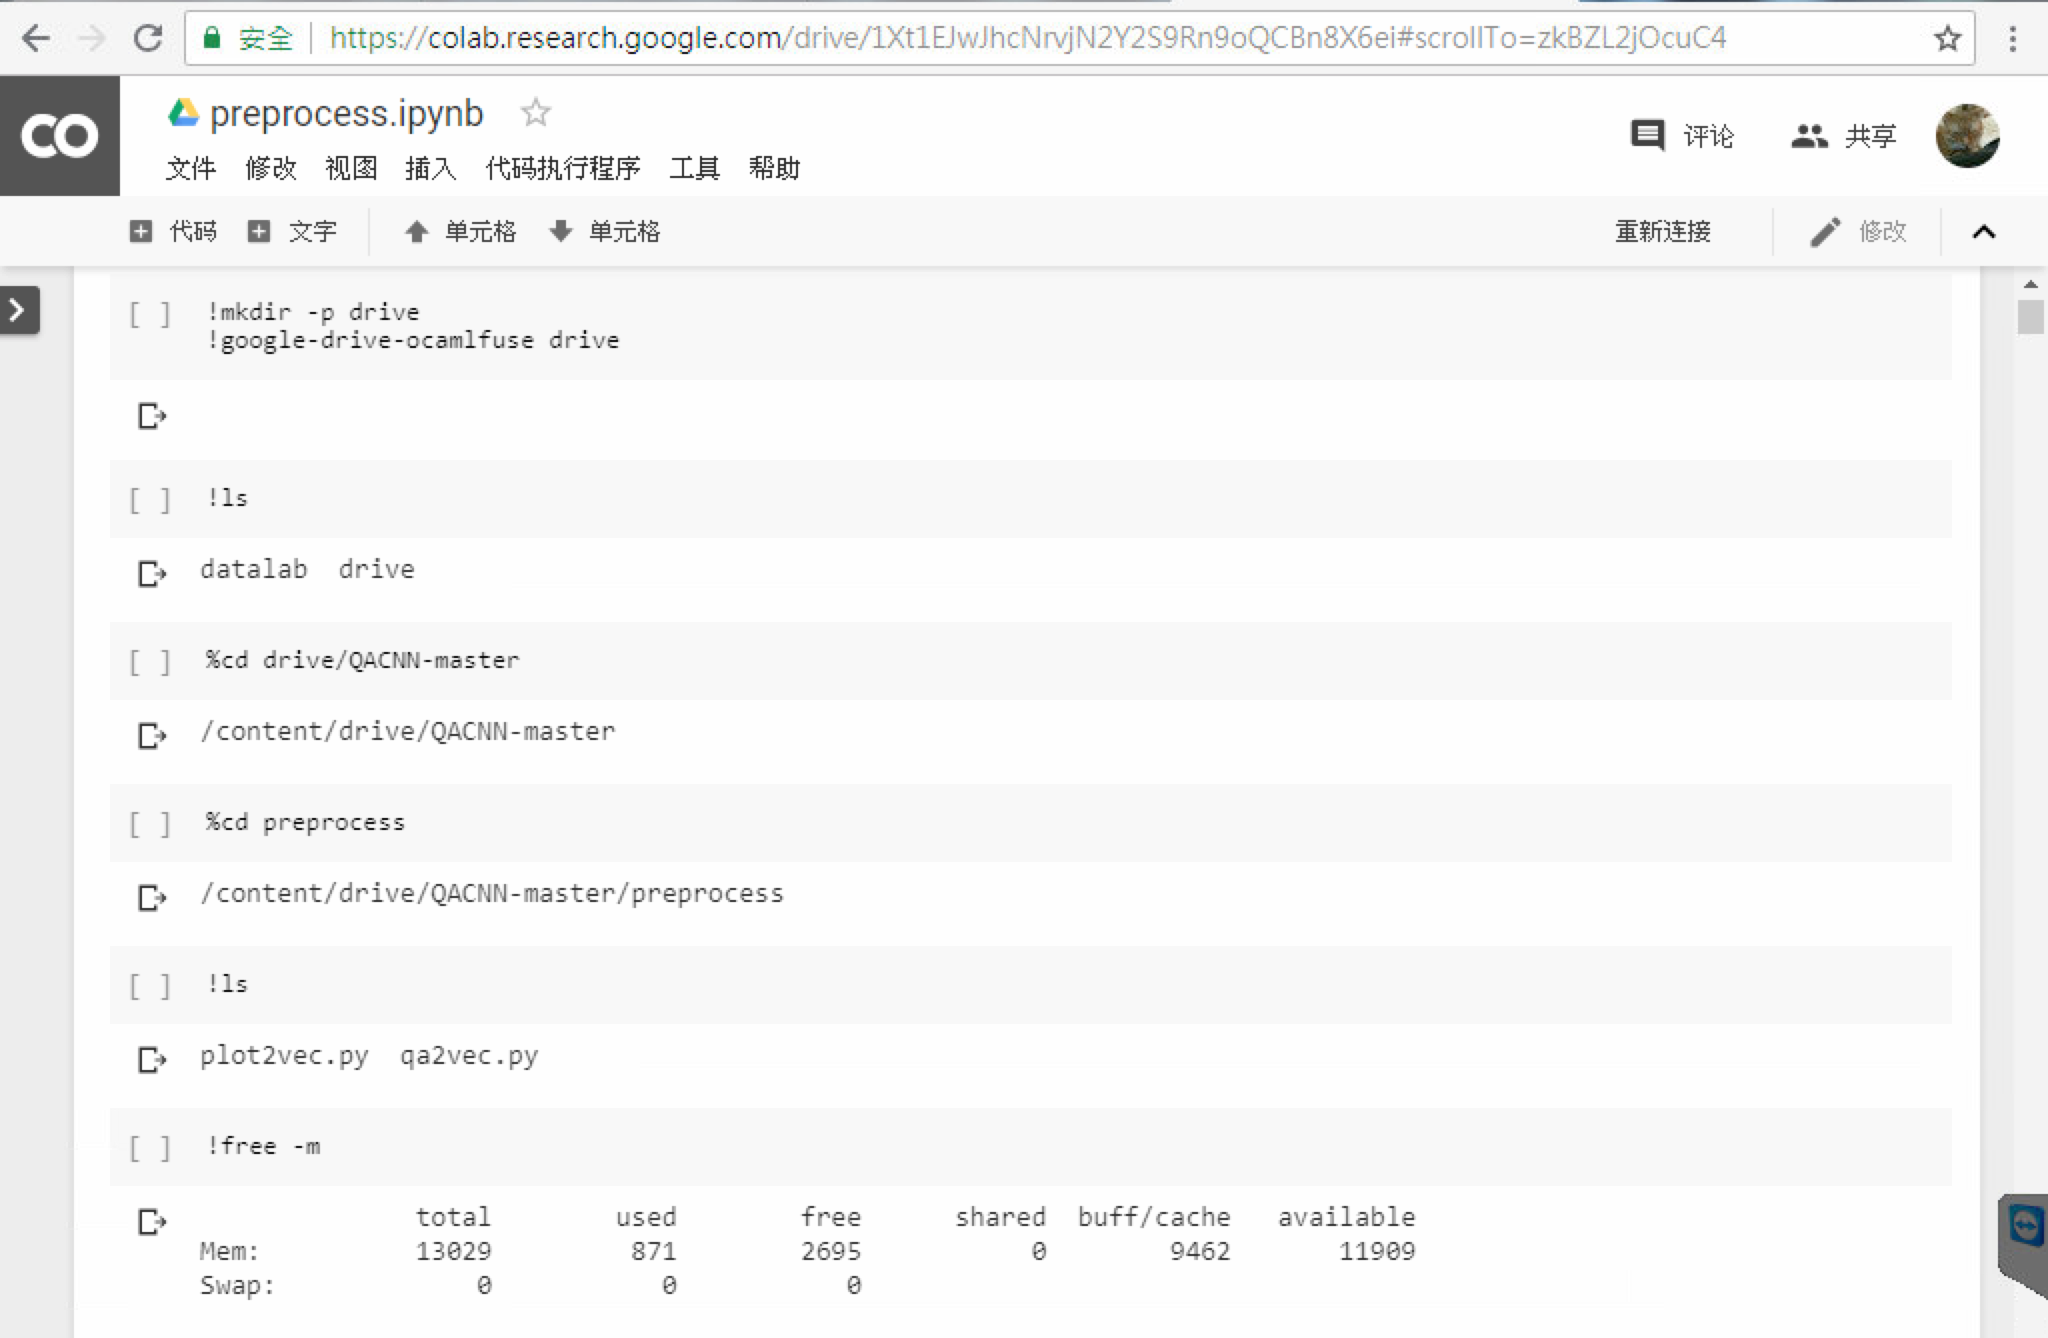
Figure 5 mount google drive and change directory to QACNN-master/preprocess/
Figure 5 呈現mount google drive與更改路徑到QACNN-master/preprocess/執行的結果。
3 Run plot2vec.py
3-1 原始plot2vec.py在colab執行失敗原因
type
!python plot2vec.py
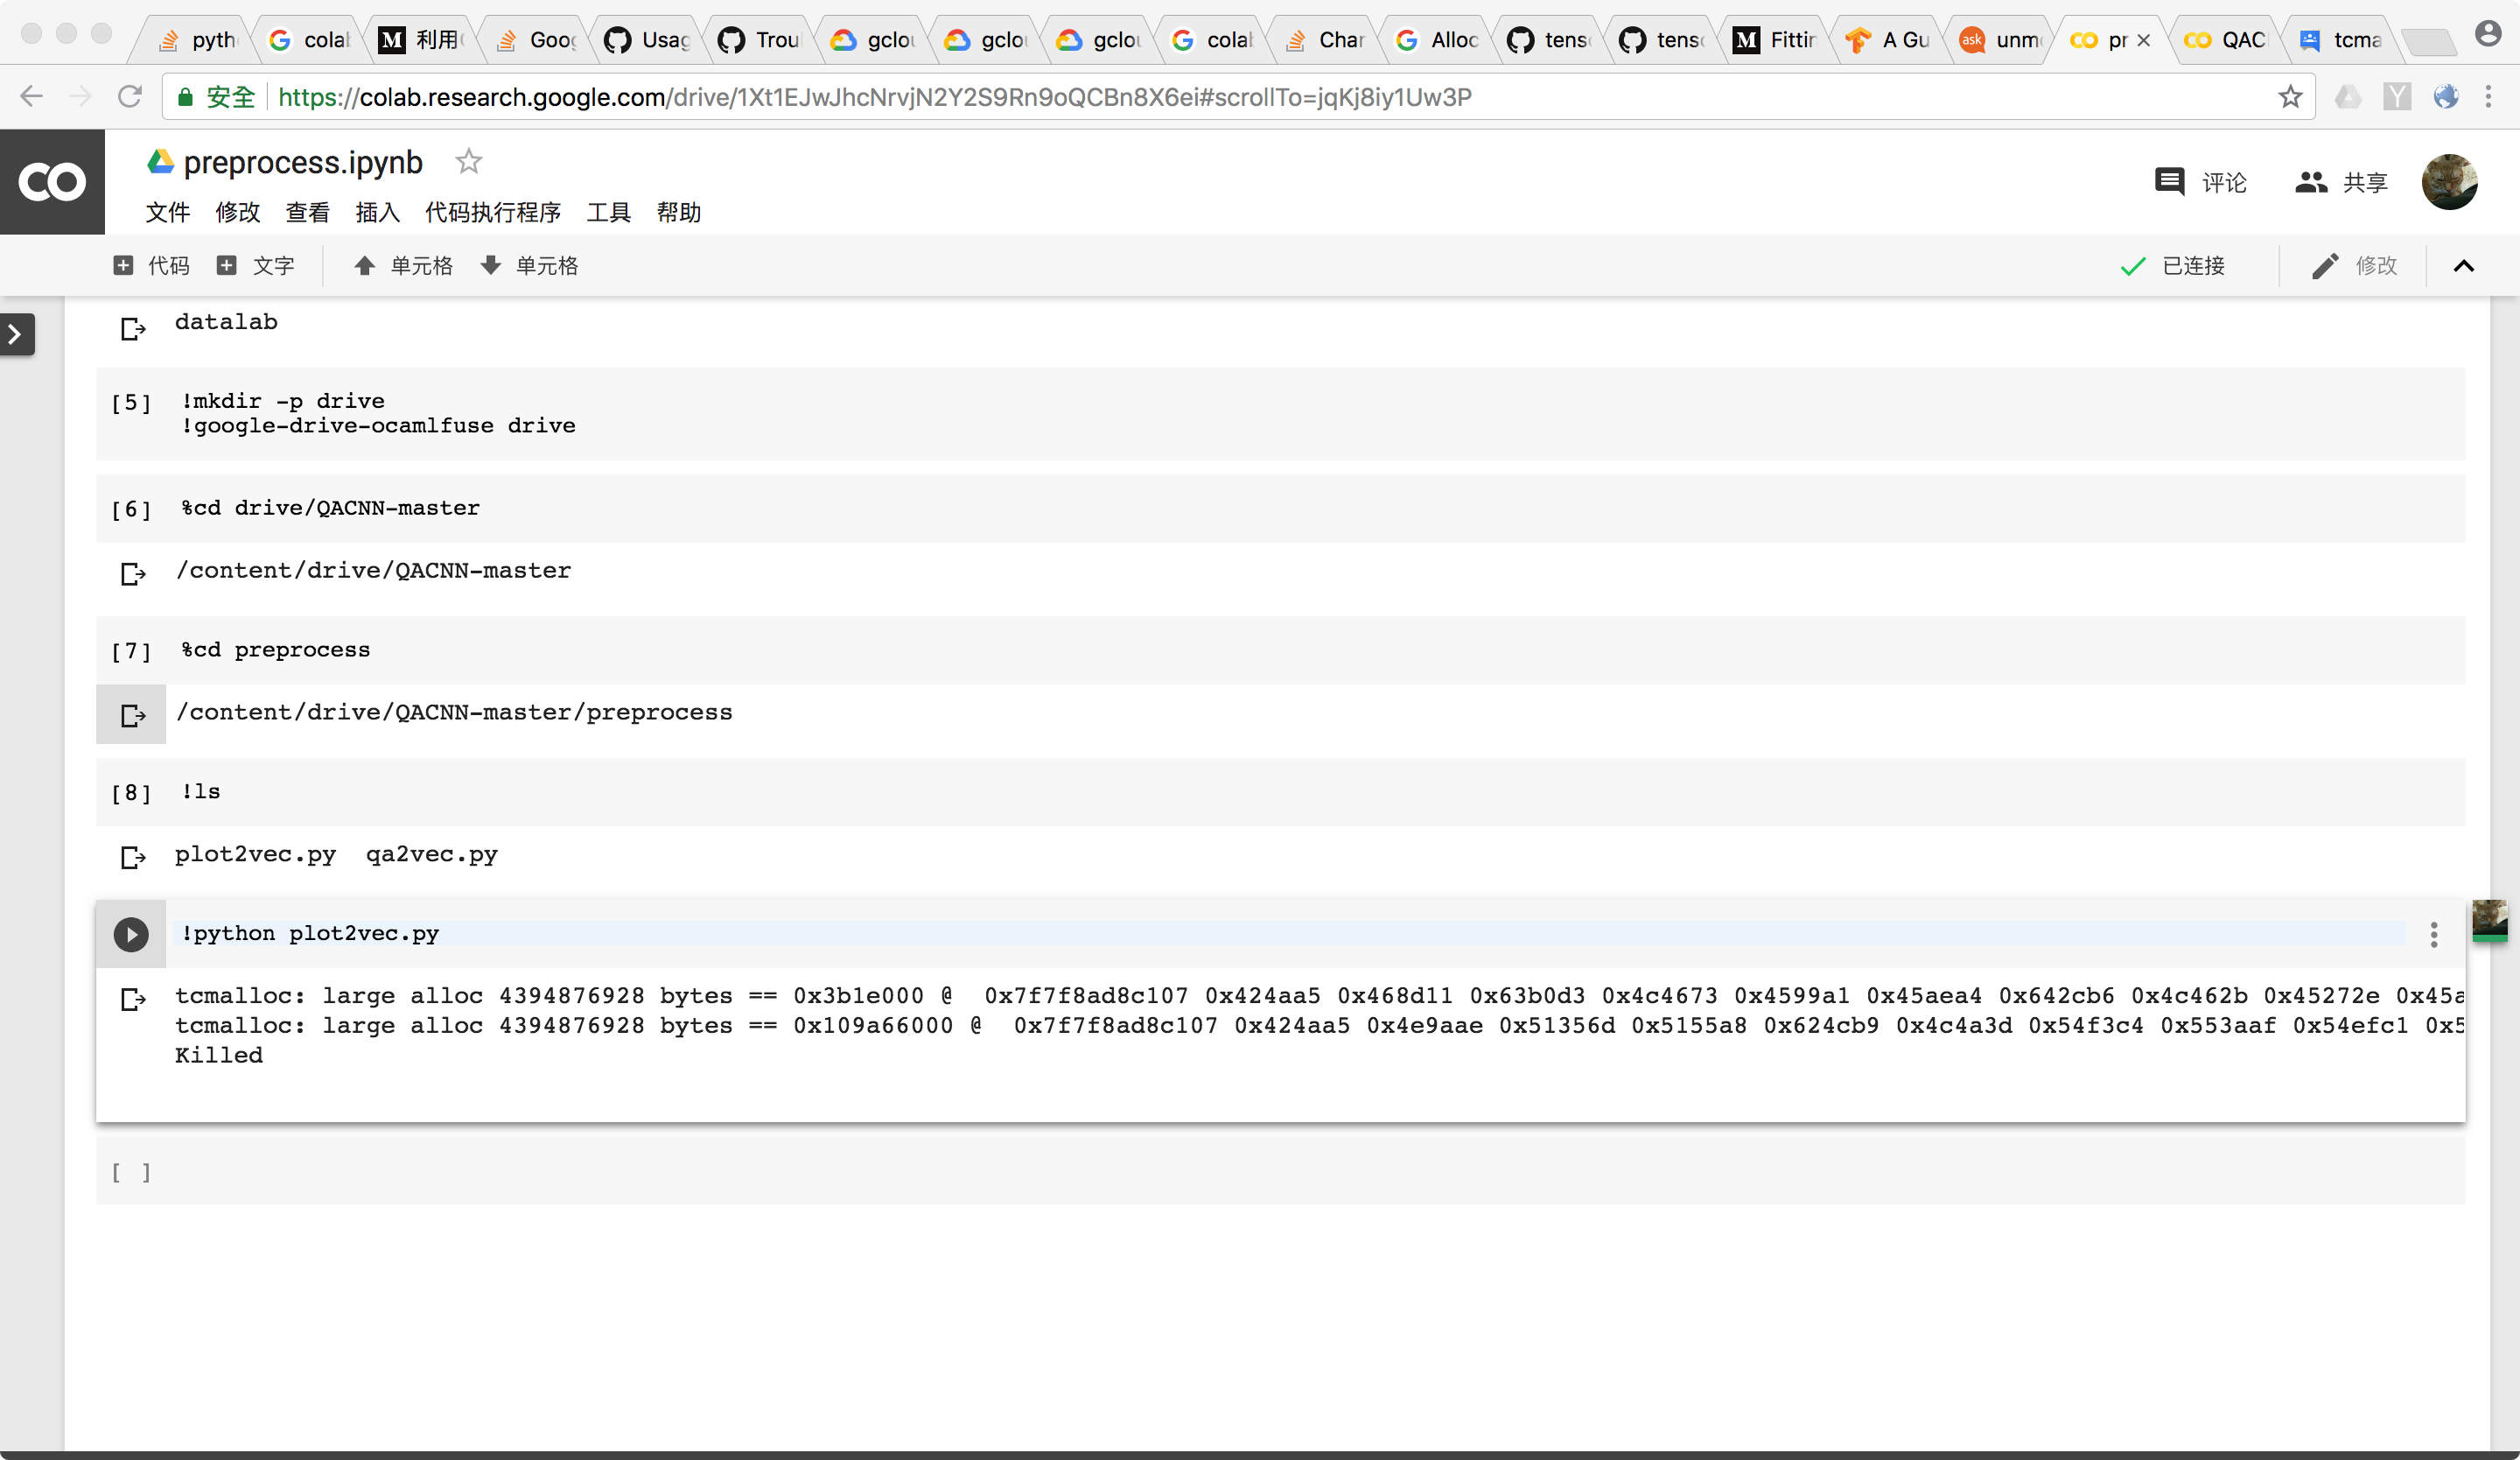
Figure 6: Process Killed due to larger alloc
Figure 6 顯示Colab會超過記憶體上限,把Process殺掉。
初步替代方案 在本地端把main.py需要的json檔準備好,上傳到google drive。[問題2018/7/2解決]
3-2 修改plot2vec.py後在Colab上正常執行
原因json.load() 去讀取glove.42B.300d.json,系統需要16GB來載入。但是Colab System Info.顯示,系統記憶體只有13GB [1]。
改良方法改用ijsonmodule[2]來讀取大型json檔glove.42B.300d.json,
ijson will iteratively parse the json file instead of reading it all in at once。
細節把glove_dict = json.load(glove_file)改成glove_dict = dict(ijson.items(glove_file, 'meta.view.columns.item'))。
type
!pip install ijson

!python plot2vec.py

Figure 7 採用ijson之後執行 plot2vec.py
3-3 修改print方式讓cell不會破圖
原始Cell是一個字一行,但是會讓cell輸出一半輸出不見。
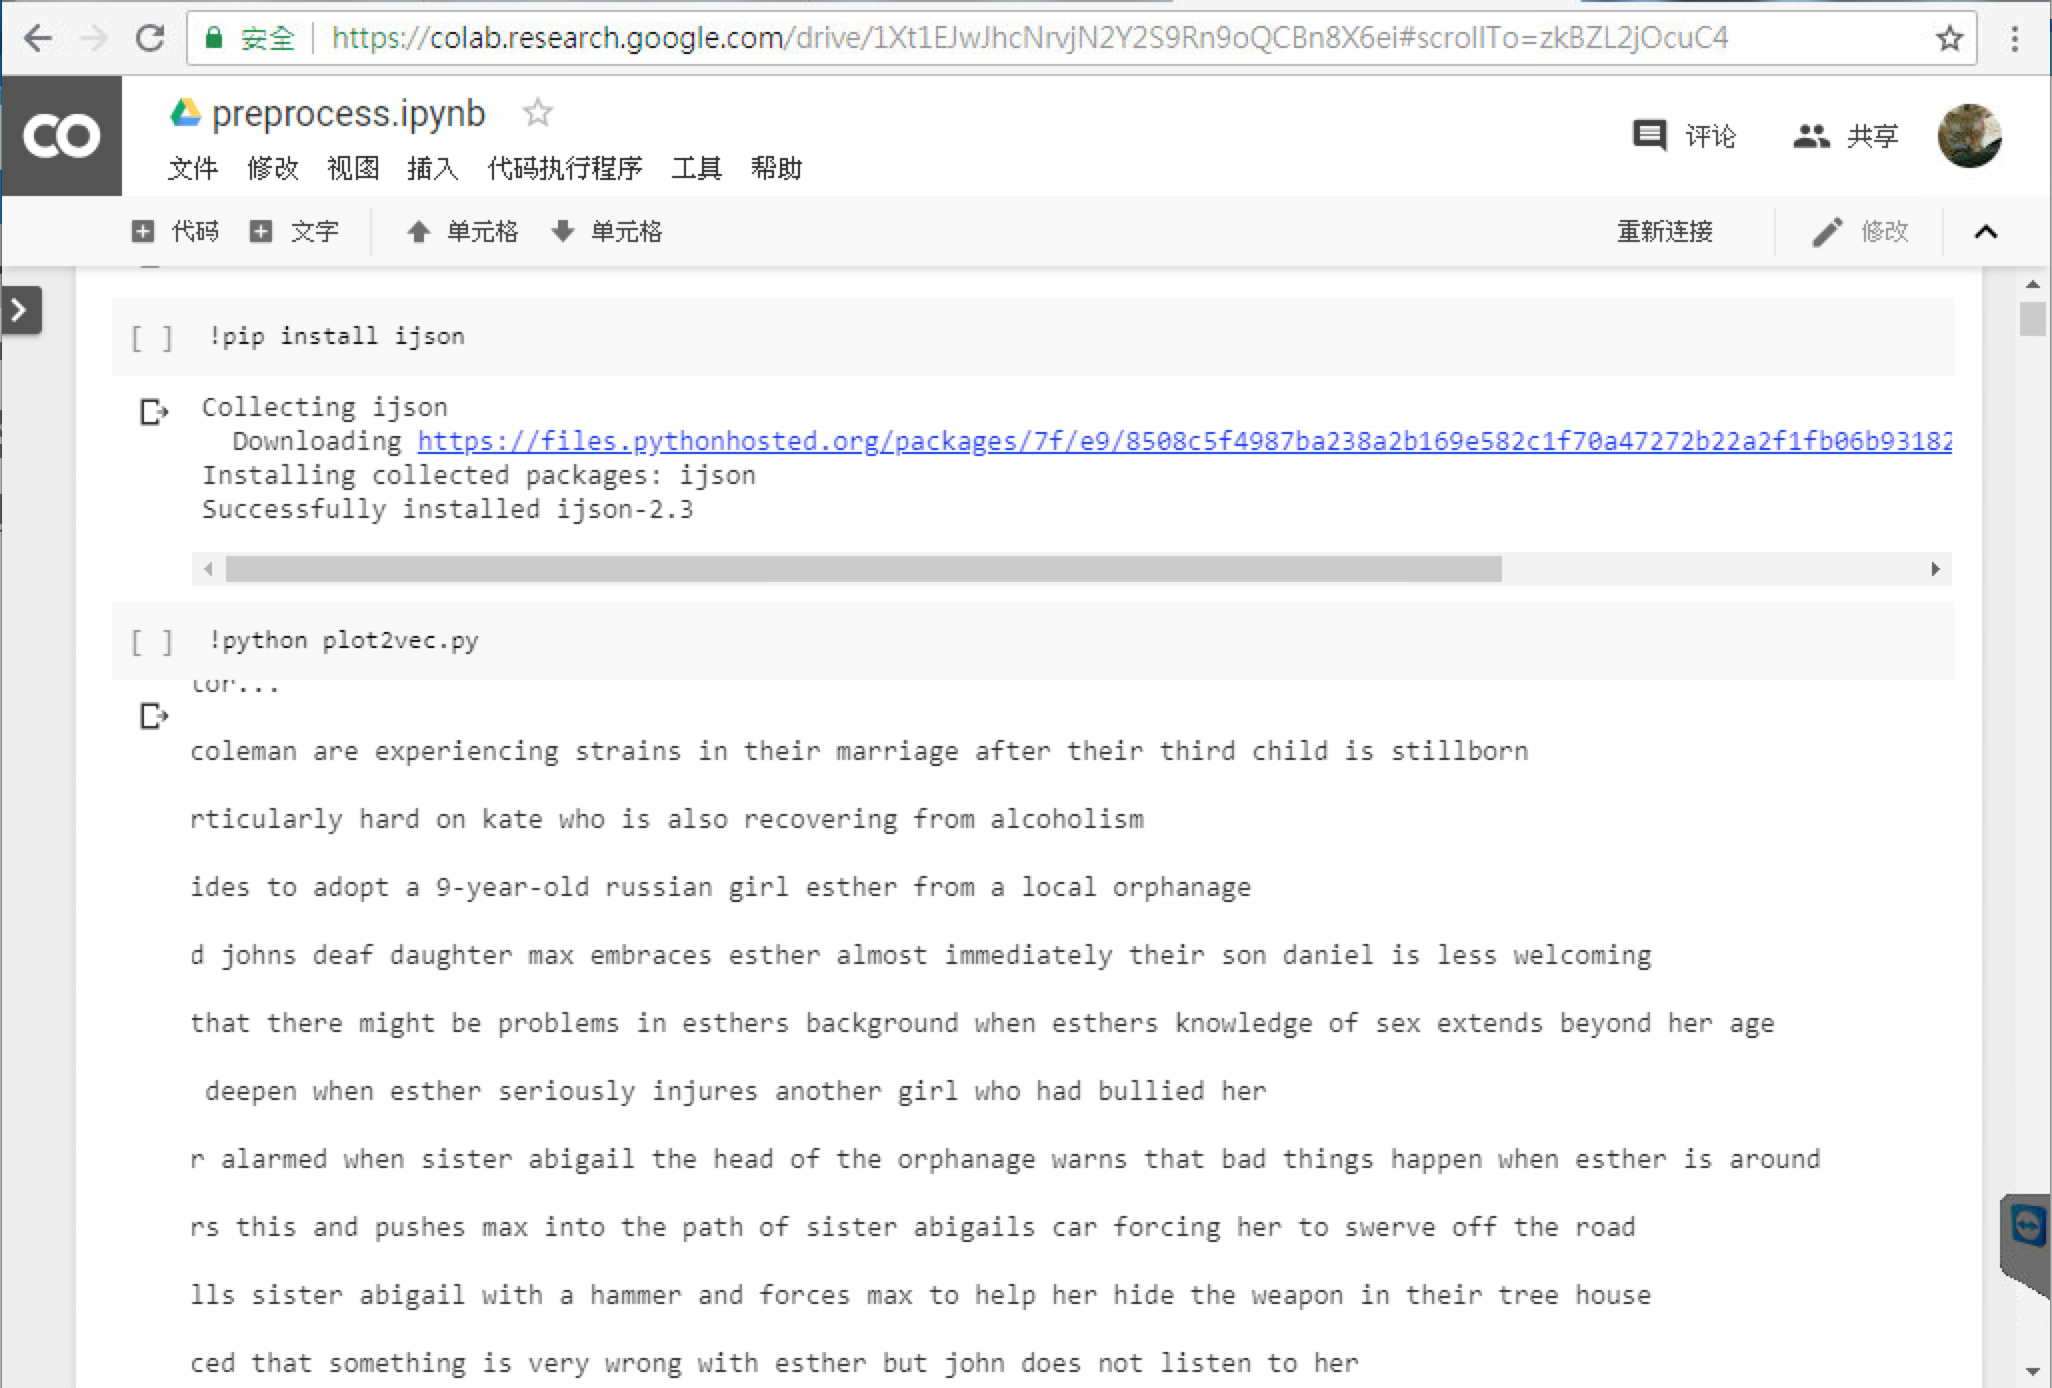
Figure 8修改print(word)後執行 plot2vec.py **
4 Run qa2vec.py
與plot2vec.py相同,為了在colab上可以正常執行,必須把glove_dict = json.load(glove_file)改成glove_dict = dict(ijson.items(glove_file, 'meta.view.columns.item'))。
type
!python qa2vec.py
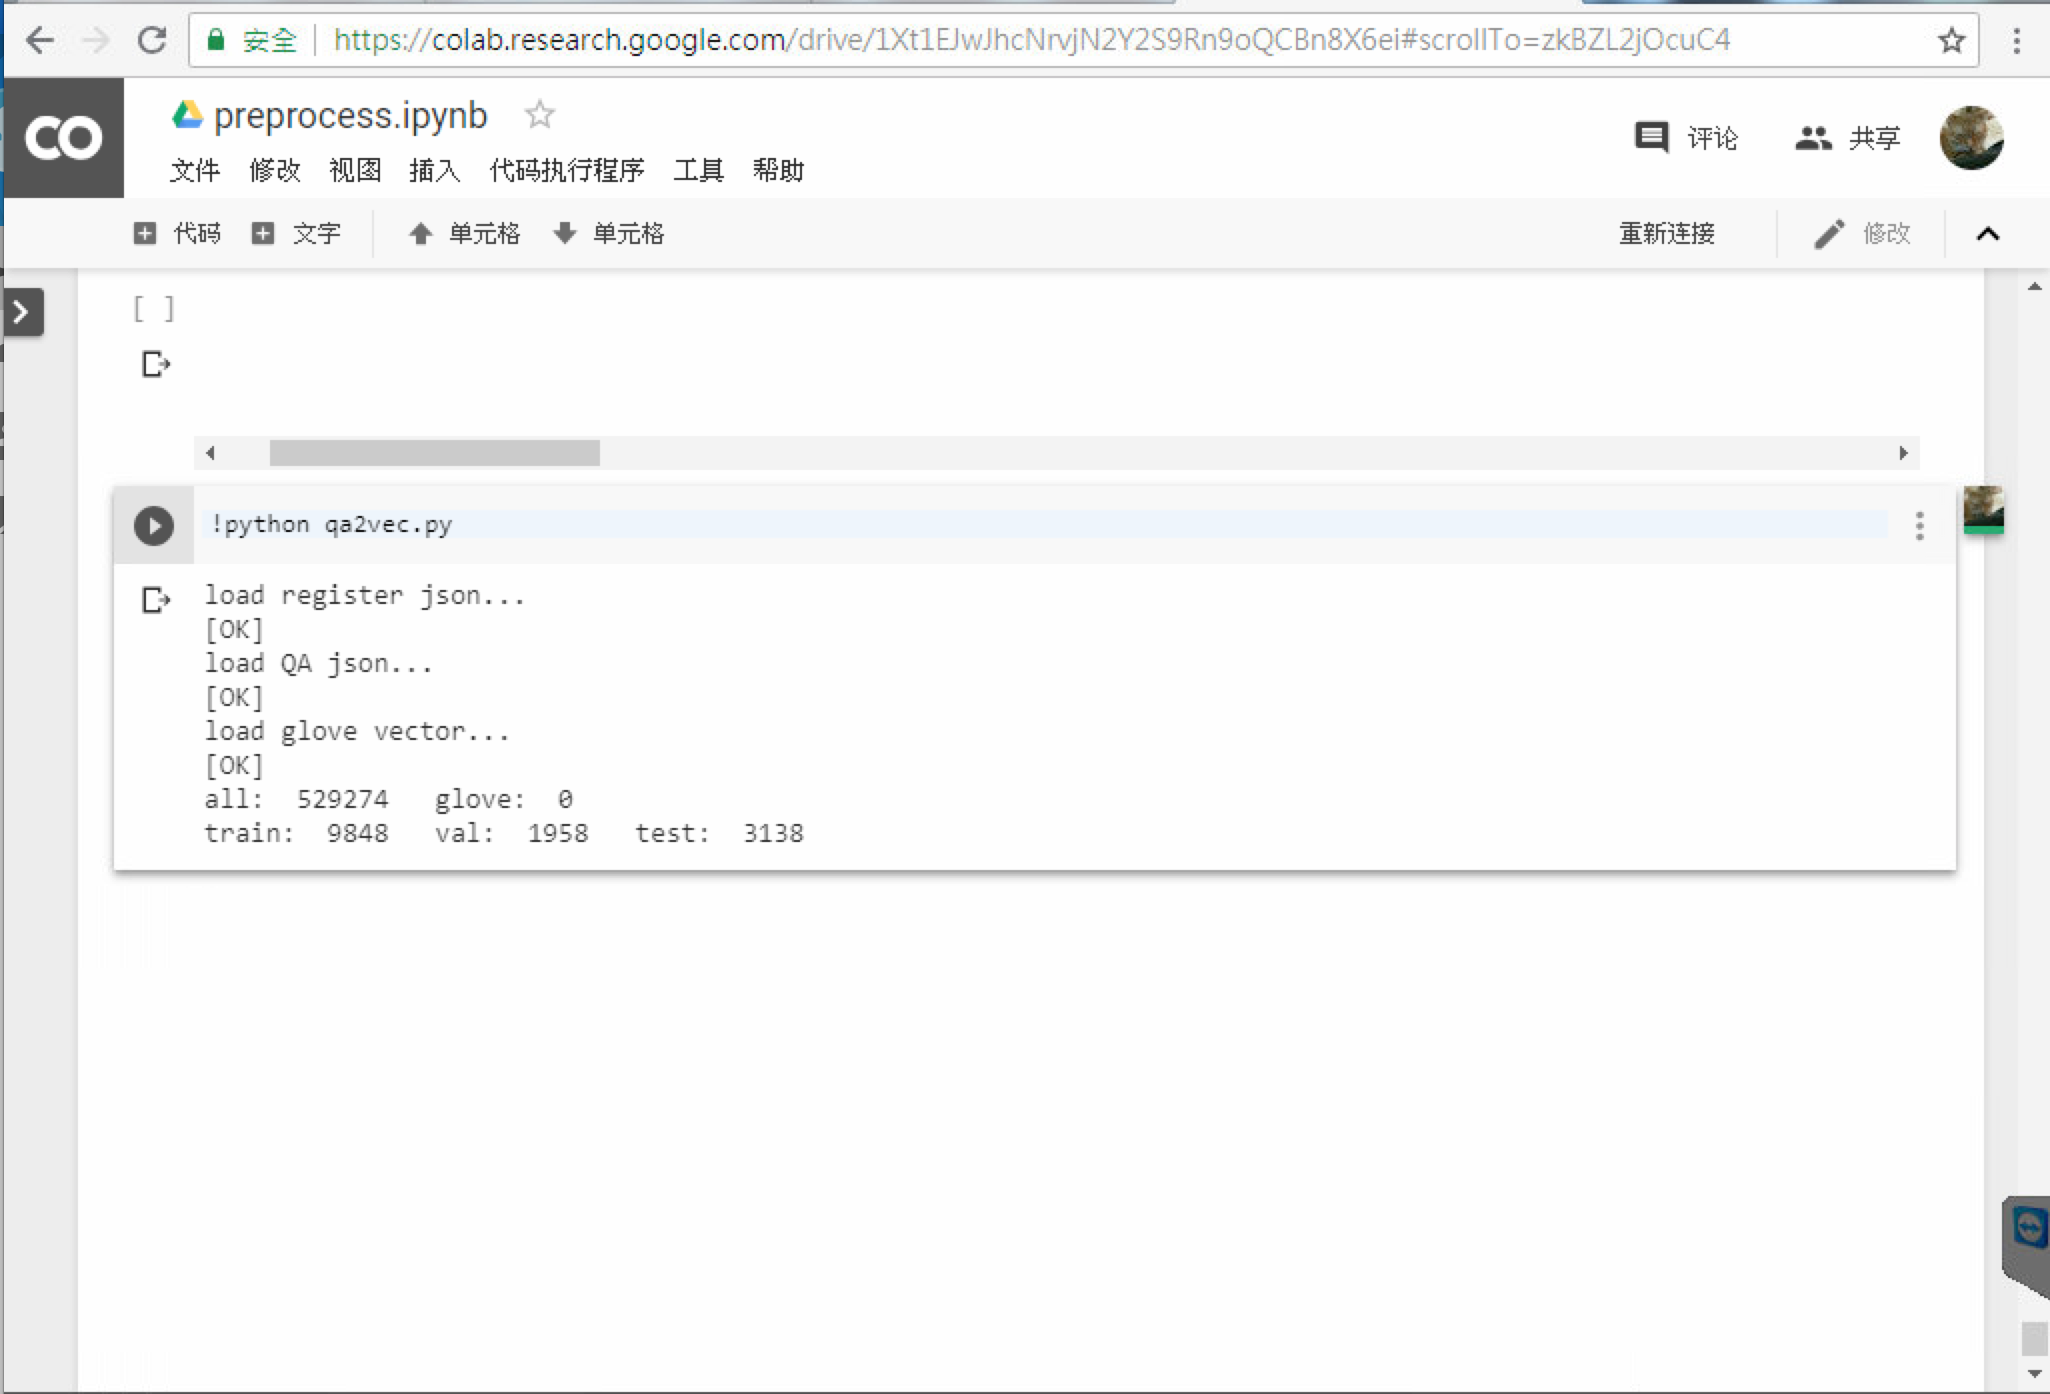
Figure 9 修改ijson執行 qa2vec.py
Figure 9 呈現執行qa2vec.py後的結果。
[1]
https://stackoverflow.com/questions/47805170/whats-the-hardware-spec-for-google-colaboratory